

Peptide Reconstitution Guide: 2026 Australian SOPs
What if the reconstitution step, rather than the peptide itself, is where research consistency is lost? A peptide reconstitution guide should make each calculation and handling decision clear, particularly when working with compounds such as Tirzepatide. Incorrect volumes, an unsuitable diluent or poor storage can compromise the reliability of a preparation.
This guide provides a repeatable framework for researchers preparing lyophilised peptides. It covers concentration calculations, how Certificates of Analysis (COAs) can help verify documented peptide content, and practical considerations for selecting bacteriostatic water and storing reconstituted material. It also explains how to check product information and supporting documentation when sourcing peptides and diluents in Australia. All information is for laboratory research purposes only. These materials are not for human or animal use.
Key Takeaways
- Use this peptide reconstitution guide to follow a consistent preparation workflow and reduce avoidable handling errors.
- Prepare the workspace and required materials before starting, and select a diluent that suits the research protocol.
- Calculate concentration by dividing the peptide amount in milligrams by the diluent volume in millilitres.
- Check the Certificate of Analysis (COA) for documented peptide identity and purity, and use the relevant information in your calculations.
- Follow compound-specific storage guidance and protect reconstituted material from unnecessary light and temperature fluctuations.
Peptide Reconstitution Guide: Fundamentals for Laboratory Research
Peptide reconstitution is the controlled process of returning a lyophilised, or freeze-dried, compound to a liquid state by combining it with a suitable diluent. The peptide is the solute; the liquid used to dissolve it is the solvent. Both components affect the resulting preparation, so select the diluent and handling conditions according to the compound’s documentation and the laboratory’s approved protocol.
Peptides are chains of amino acids. Their sequence and chemical structure underpin their properties, which is why maintaining compound integrity matters throughout preparation. For background on how peptide chains are made, see Chemical peptide synthesis. Reconstitution doesn’t create a new peptide; it changes the compound’s physical state. The aim is to do so without introducing avoidable contamination or conditions that could affect the material.
The Role of Lyophilisation in Compound Stability
Lyophilisation removes water from a frozen preparation under reduced pressure, leaving a dry powder or cake. Limiting moisture can help a peptide remain more stable during storage than it would in solution, but it doesn’t guarantee that the compound’s structure or activity is unchanged. Follow the supplier’s storage instructions and review available quality documentation, such as a Certificate of Analysis (COA), before use.
A sealed vial helps limit exposure to moisture and air. Packaging may be described as vacuum-sealed, but vial conditions can vary. Don’t assume every vial contains a vacuum or that the closure alone prevents oxidation. Once diluent is added, the preparation is more exposed to potential degradation pathways, including oxidation, hydrolysis, aggregation and contamination. Stability depends on the compound and conditions, so don’t apply one peptide’s handling assumptions to another.
The Research Use Only (RUO) Protocol
Reconstitution for research is not general-purpose mixing. It should take place in a suitable, controlled laboratory environment under an established institutional SOP, with appropriate contamination controls and trained personnel. A clean workspace, suitable equipment and documented handling steps support consistency, but they don’t replace compound-specific instructions or a laboratory risk assessment.
Record the compound identifier, lot details, COA reference, diluent, preparation date and relevant handling conditions in line with the laboratory’s documentation procedures. These records make it easier to trace a preparation and assess differences between research runs. Treat RUO materials strictly as laboratory research materials, and follow applicable institutional requirements for their handling and disposal. A careful peptide reconstitution guide starts with this foundation: understand the material, verify its documentation and use a controlled, recorded process.
Essential Equipment and Diluent Selection for Australian Labs
Equipment and diluent choices affect preparation consistency, contamination controls and the accuracy of later measurements. Before starting, check the compound’s documentation and the laboratory’s approved SOP. No single diluent or setup is suitable for every compound.
Prepare the required materials in advance:
- A compatible, documented diluent, selected according to the compound’s instructions.
- Sterile syringes and needles appropriate to the laboratory method and container.
- Alcohol swabs and a clean, prepared work surface.
- Laboratory records for identifying the compound, lot and preparation details.
Bacteriostatic Water vs. Sterile Water
Bacteriostatic water contains 0.9% benzyl alcohol, which can inhibit bacterial growth. It’s commonly recommended for multi-dose research preparations where the compound’s instructions permit it. The preservative doesn’t sterilise a solution or prevent every form of contamination. Sterile water lacks this preservative, so don’t assume it’s appropriate for repeated access to a vial. Confirm diluent compatibility and follow the supplier’s directions and institutional SOP.
Choose the container volume to suit the documented research plan and avoid unnecessary handling or waste. Glow Up Lab lists 10mL BAC Water as a research supply. Check its product information and the peptide’s compatibility before selecting it. Don’t adjust pH or add other substances unless the compound’s validated protocol specifically directs this. Requirements can vary, including for compounds such as Tirzepatide.
Syringe and Needle Selection
There isn’t one universally suitable needle gauge or syringe for every vial and laboratory method. Make your selection according to the institution’s SOP and equipment specifications. Repeated punctures can damage a vial septum, while unsuitable handling may compromise the container closure. Low-dead-space syringes can reduce residual liquid in the device, but their suitability depends on the measurement method and required accuracy.
Use sterile, single-use components where the protocol requires them, and don’t reuse a syringe or needle. Prepare the work surface according to laboratory procedures, use alcohol swabs as directed, and allow treated surfaces or vial stoppers to dry before access. These controls support consistency; they don’t replace aseptic technique training or a validated SOP.
When sourcing supplies, consider traceability. Check product labelling, documentation, lot identification and storage instructions, and use a consistent source where practical. Australian domestic sourcing can help laboratories standardise their supply chain. Glow Up Lab supplies research peptides and BAC Water, with detailed product information and supporting documentation. Verify the relevant records and compatibility before use.
Step by Step Reconstitution Protocol: Protecting Compound Integrity
Reconstitution should follow the compound’s documentation and a validated laboratory SOP. The sequence below outlines handling principles, not a substitute for compound-specific instructions. A careful peptide reconstitution guide prioritises controlled conditions and gentle mixing over speed.
Prepare the Workspace and Vials
Use a clean, uncluttered work area with temperature conditions specified by the laboratory protocol. Gather the required diluent and sterile equipment before opening materials. Clean vial stoppers with 70% isopropyl alcohol where this is specified by the SOP, then allow them to air-dry. Avoid touching disinfected surfaces or placing sterile components on an unprepared bench.
Add Diluent Gradually
- Confirm the target diluent volume from the approved protocol and relevant compound documentation. Draw that calculated volume into a sterile syringe using the laboratory’s aseptic technique.
- Check the vial and closure before access. Some vials may have reduced pressure, but conditions can vary. Don’t assume a vacuum is present, force air into the vial, or allow a sudden pressure change. Follow the institution’s procedure for safe pressure management.
- Introduce the diluent slowly. Where the vial geometry allows, direct the flow down the inside glass wall rather than onto the lyophilised cake. A direct, forceful stream can create unnecessary mechanical stress and foaming.
Pause if the vial behaves unexpectedly, the stopper is damaged, or the liquid cannot be added in a controlled way. Don’t improvise a pressure-equalisation method; consult the laboratory SOP or supervisor.
Allow the Material to Dissolve
Avoid vigorous shaking or repeated forceful agitation. These actions can increase foaming and mechanical stress, while the effect on a particular peptide depends on its properties. If solid material remains, gently swirl or tilt the vial only if the compound instructions permit it. Give the solution time to dissolve according to the documented method. Don’t apply heat or add extra diluent to speed the process unless the validated protocol directs this.
Record the preparation details, including the compound and lot identifiers, diluent, volume and date, in the laboratory’s records. Inspect the solution under suitable lighting. Clarity and absence of visible particles are useful observations, but appearance alone can’t confirm identity, purity, sterility or molecular integrity. If the solution is unexpectedly cloudy, discoloured or particulate, set it aside and follow the laboratory’s deviation procedure rather than using it. Apply the compound-specific storage instructions once preparation is complete.
Concentration Calculations and Reconstitution Mathematics
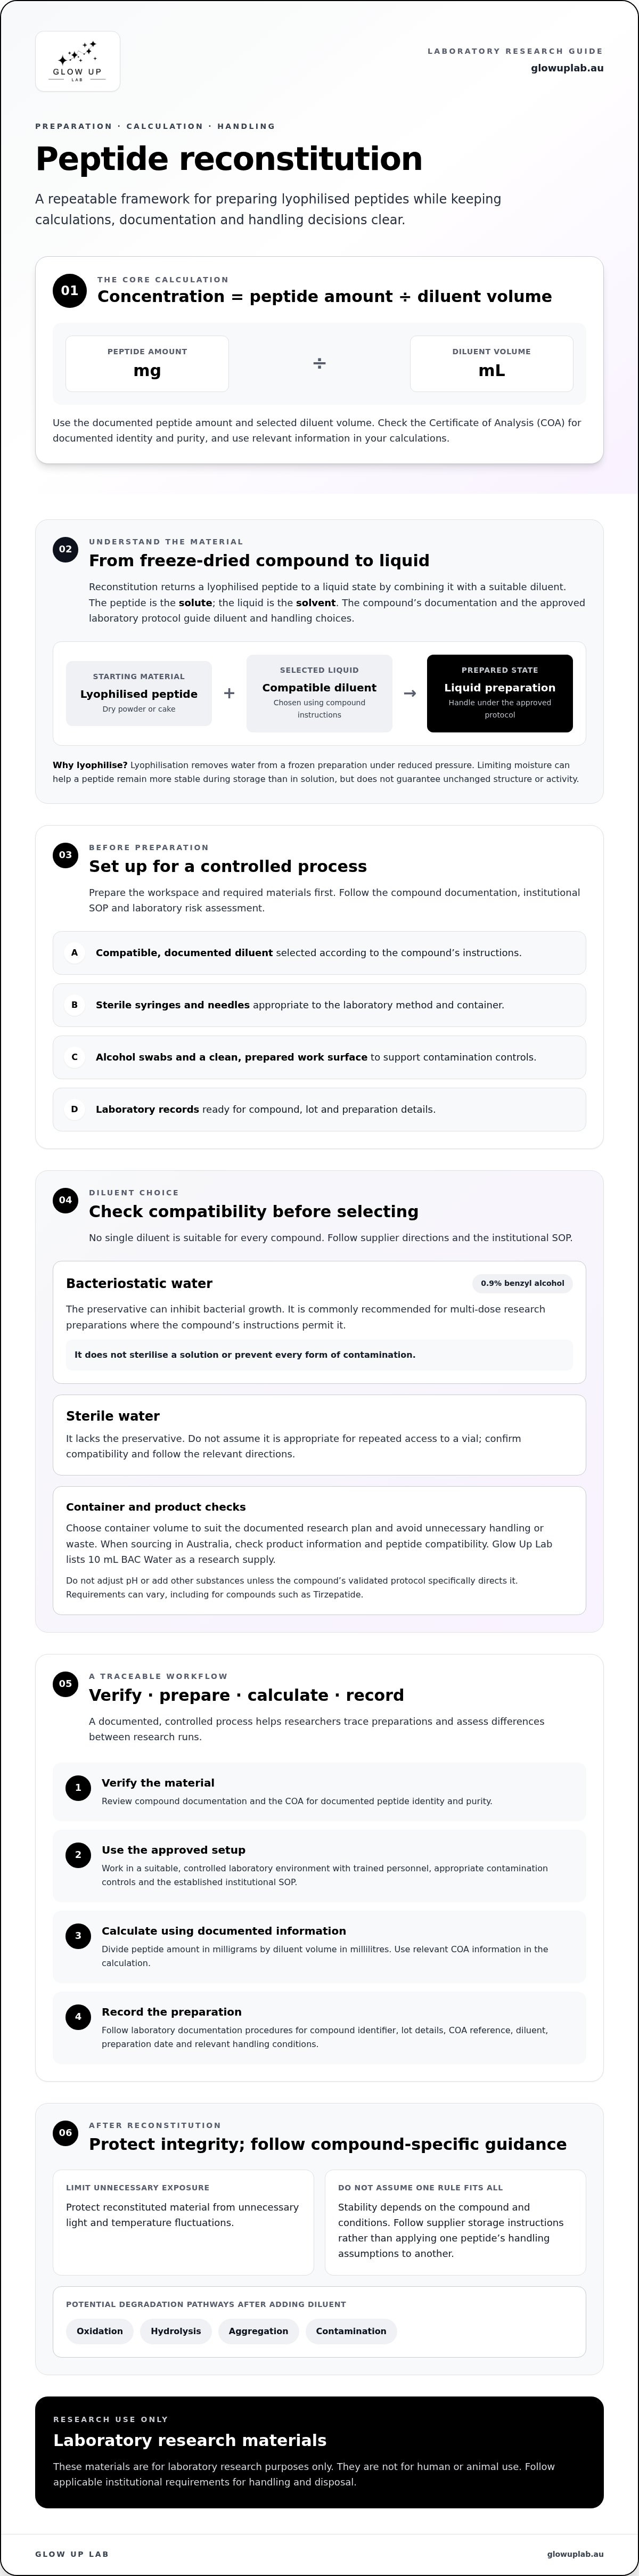
Calculate concentration from the amount of peptide and the volume of diluent added. Use this formula:
Peptide amount (mg) ÷ diluent volume (mL) = concentration (mg/mL)
The examples in this peptide reconstitution guide use nominal amounts for illustration. Confirm usable peptide content against the Certificate of Analysis (COA) and follow the compound-specific protocol. A vial’s labelled mass and the total mass of its powder cake aren’t necessarily interchangeable for calculations.
Practical Calculation Examples
For a hypothetical 10mg Retatrutide 10mg vial with 2mL of diluent added:
- 10mg ÷ 2mL = 5mg/mL.
- 5mg/mL × 1,000 = 5,000mcg/mL.
- If a laboratory aliquot is 0.01mL, it contains 0.05mg, or 50mcg, based on that nominal concentration.
Graduation marks vary between syringes, so “mcg per tick” has no universal value. First identify the volume represented by a graduation on the specific instrument, then multiply that volume by the calculated concentration. This describes a laboratory volume calculation, not an administration instruction.
For another example, 30mg with 1.5mL added gives 20mg/mL by the same formula. A Tirzepatide 30mg study should use only a volume supported by the relevant compound documentation and approved protocol. Less diluent raises concentration, but may affect solubility and handling suitability. Don’t select a smaller volume solely to make aliquots more concentrated.
Check Assumptions and Record the Result
The volume of diluent added doesn’t always equal the final solution volume. A powder cake may occupy space, but don’t apply an assumed displacement correction without validated data for that compound and method. For routine calculations, state clearly whether the result uses the volume added or a verified final volume. If precise final concentration is critical, use an appropriate validated measurement method.
Keep units consistent. One milligram equals 1,000 micrograms; confusing mg with mcg creates a thousand-fold calculation error. Use a calculator to check the arithmetic, then independently verify the inputs and units. A calculator can’t confirm the vial’s actual peptide content or whether the chosen diluent volume is appropriate.
Record the lot, COA reference, peptide amount used, diluent and volume, calculated concentration, calculation basis and preparation date. Consistent records support meaningful batch-to-batch comparisons. Dilution changes concentration, but don’t assume that a particular dilution alone determines stability, especially for sensitive compounds such as neuropeptides. Follow the stability information for the specific compound and preparation.
Post-Reconstitution Handling: Storage and Stability Protocols
Once a peptide is in solution, storage conditions become part of the research protocol. As a general reference, reconstituted peptides are stored refrigerated at 2°C to 8°C, but this doesn’t establish a stability period for every compound. Follow the supplier’s compound-specific instructions and the laboratory’s validated SOP. Don’t assume one preparation’s usable timeframe applies to another.
Refrigeration, Freezing and Visual Checks
Keep reconstituted material within the documented cold chain and minimise temperature fluctuations. Repeated freezing and thawing can damage a preparation, so freezing a reconstituted solution is generally not recommended. If longer-term storage is necessary, use only a validated protocol. Research guidance may specify single-use aliquots and ultra-low-temperature storage, but confirm the conditions for the compound and method.
Inspect the vial before use. Cloudiness, precipitation or a change in colour may signal a problem, but appearance alone can’t confirm degradation or establish that a solution remains suitable for research. If the solution looks different from its documented appearance, don’t try to resolve the change by shaking or warming it. Follow the laboratory’s deviation and disposal procedures.
Stability, Light Protection and Transport
Stability in solution varies with the peptide, diluent, preparation method and storage conditions. Available guidance describes periods ranging from several days to up to four weeks, with some sources recommending use within 28 days. Treat these as general ranges, not a guarantee for any specific compound. Check current, compound-specific data, particularly before setting a study schedule. For Selank research, protect the vial from direct light and avoid unnecessary exposure to room temperature; confirm handling details against the relevant documentation.
For movement between laboratory areas, keep the vial securely closed and protected from light in a suitable temperature-controlled carrier. Avoid vigorous agitation, direct contact with frozen packs and prolonged time outside the validated storage range. Return it to the appropriate storage conditions promptly, and record any temperature excursion according to the laboratory SOP.
Label each vial with the compound identifier, lot, diluent, preparation date and time, concentration, storage conditions and any protocol-defined discard date. Maintain a temperature log where required. Consistent records help researchers identify handling differences between batches and interpret results more reliably. This peptide reconstitution guide cannot replace stability data for a specific compound. Use the supplier’s current documentation and your laboratory’s approved protocol to set storage limits.
Make Each Preparation a Repeatable Research Step
Reliable reconstitution depends on more than adding diluent. Start with compound documentation and an approved laboratory SOP, handle materials carefully to limit unnecessary stress, and record calculations and storage conditions for traceability. These steps work together to support research consistency.
Concentration calculations are only as dependable as their inputs, so check the COA and state the basis for each calculation. After preparation, follow compound-specific stability information rather than assuming a universal storage window. Clear records make each preparation easier to review and compare.
Glow Up Lab supplies research peptides and BAC Water with secure nationwide shipping and Australian-based support. Explore research peptides and BAC Water from Glow Up Lab, and review the available product information and supporting documentation when selecting supplies for your laboratory protocol.
With a documented method and verified inputs, your team can approach each preparation with greater consistency and confidence.
Frequently Asked Questions
How much Bacteriostatic Water should I add to a 10mg peptide vial?
The volume depends on the target concentration and the compound’s documented protocol. As a calculation example, adding 2mL to 10mg gives a nominal concentration of 5mg/mL. This is not a universal instruction: check the Certificate of Analysis (COA), supplier documentation and laboratory SOP before preparing a vial. Record the volume used and the calculation basis so the concentration can be reviewed and reproduced.
Can I use normal tap water or bottled water for peptide reconstitution?
No. Tap and bottled water aren’t appropriate substitutes for a documented laboratory diluent because their composition and suitability for this purpose aren’t controlled by your research protocol. Select a suitable sterile diluent, such as bacteriostatic water when the compound instructions specify it. Confirm compatibility before use, and don’t assume that water labelled as pure or suitable for drinking meets laboratory requirements.
What happens if I accidentally shake the peptide vial after adding water?
Shaking can create foaming and mechanical stress, but one accidental shake doesn’t by itself establish that a peptide has degraded. Stop agitation and inspect the vial for visible changes, such as persistent foam, cloudiness or particles. Record the incident and follow the compound-specific SOP or ask the laboratory supervisor how to assess it. Appearance alone can’t confirm molecular integrity or suitability for research.
How long does a reconstituted peptide remain stable in the refrigerator?
There’s no single stability period for every peptide. General guidance describes refrigerated storage at 2°C to 8°C, with stability varying from several days up to four weeks depending on the compound and conditions. Some sources recommend use within 28 days, but don’t treat that as a universal limit. Follow current compound-specific stability data and your laboratory’s validated protocol, and document preparation and storage details.
Why is my peptide solution cloudy after I reconstituted it?
Cloudiness may indicate incomplete dissolution, precipitation, contamination or another issue with the preparation. Don’t shake, warm or otherwise try to correct the solution unless a validated protocol directs you to do so. Check the compound instructions and document what you observe. If the appearance is unexpected, set the vial aside and follow the laboratory’s deviation procedure. Visual inspection alone can’t identify the cause or confirm quality.
Is it necessary to equalise the pressure in the vial before adding the diluent?
Don’t assume every vial contains a vacuum or use an improvised pressure-equalisation method. Vial conditions and closures can differ, and forcing air in or causing a sudden pressure change may compromise handling or the closure. Follow the laboratory’s approved procedure for the specific vial and compound. If the diluent won’t enter smoothly or the vial behaves unexpectedly, stop and consult the SOP or a supervisor.
Can I reconstitute multiple peptides in the same vial for research?
Only do this if a validated protocol specifically establishes compatibility, stability and a suitable method for the combination. Otherwise, keep compounds in separate, clearly labelled vials. Mixing can make concentration calculations, traceability and interpretation more difficult, and compatibility shouldn’t be assumed from appearance. Document the rationale and method in the research record, and consult the relevant compound documentation before preparing any combination.
Where can I buy high-quality BAC water for research in Australia?
Glow Up Lab supplies BAC Water in 3mL and 10mL sizes for research, alongside research peptides. The Australian-based supplier provides nationwide shipping and support. Before selecting a diluent, review its product information and confirm that it matches the compound documentation and laboratory SOP. Keep relevant lot and preparation records, and don’t treat a supplier’s product listing as a substitute for compatibility checks.